Seated Knee Tucks: Ultimate Guide to Strong Abs
Engage your hip flexors and abs at anytime and anywhere by seated knee tucks. Learn to master this exercise and seven variations and alternative exercises.
One of the most significant obstacles to exercising is the absence of time. The demands of work and family obligations can make fitness plans difficult to keep up with. Many people cannot go to the fitness center more than a few each week.
If you’re short on fitness time, make the most out of your exercises by making sure you focus on exercise that is compound. This way, you don’t have to exercise more often or for as long.
Another method to get around the inability to work out is adding or substituting gym workouts with ones that you can perform at home. This will save time since you don’t need to go to the gym and exercise whenever you have time.
Core exercises are particularly beneficial for at-home workouts because they need no equipment other than an exercise mat to lay on. Do you have a mat? You could make use of a towel folded in place. Although this method will not do much to improve your muscle mass or strength, it’s still a good idea for general fitness and overall health.
In the article, we will discuss seated knee tucks, a core bodyweight exercise that is perfect for home workouts.
Seated Knee Tucks
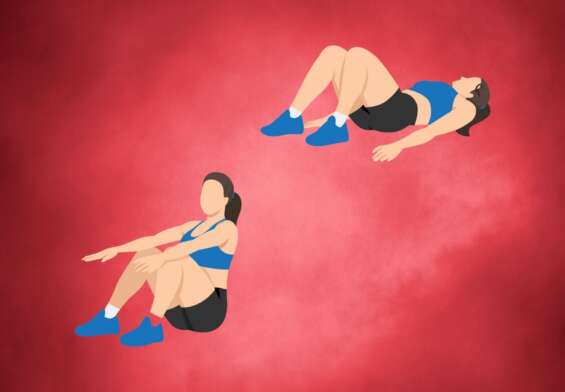
Also called the reverse crunch, seated knee tucks is an important component of any fitness routine.
If you are looking to build six-pack abs or improve the strength of your core, then seated knee tucks can help you!
Seated Knee Tucks: Working Muscles
Primary Muscle Group
If you are thinking about working to strengthen your “abs,” you usually concentrate on building muscles in the abdominal rectus muscles. This muscle is the classic “six-packs abs,” which dominate the cover of almost every fitness magazine.
While the rectus abdominis muscle is a single one, it is still feasible to focus on specific muscle regions to improve its performance.
In this scenario, seated knee tucks concentrate on the bottom of the rectus abdominals, often referred to as “lower abdominals.”
Secondary Muscle Group
Seated knee tucks is a great way to work other secondary muscles. The transverse abdominis, the deepest muscle in your core, helps strengthen your middle section.
The hamstrings and quads of your body are responsible for flexing and extending your legs. Furthermore, the hip flexor muscles engage to assist your hips during the exercise routine.
Seated Knee Tucks: Benefits
#1 Advanced Core Strength
Seated knee tucks specifically concentrate the abdominal muscles. Therefore, regular training can help you to build a stronger core.
Core strength is essential for almost every exercise. If you’re looking to improve your ability to perform compound lifts, you should first establish a strong core.
When you’re throwing the ball or lifting weights, large objects, or just want to build those abs that are six packs seated knee tucks assist you in reaching your goals.
#2 Posture Changed
Many people are amazed that torn shoulders, an anterior pelvic tilt, and other posture issues typically originate from weakness in your core.
The abdominal muscles are accountable for supporting your spine and ensuring your body is aligned.
If you are suffering from back discomfort or pain, seated knee tucks will help improve your core strength and help you correct your posture in minutes.
#3 Improved Aesthetics
Everyone is looking to improve their abdominals. Seated knee tucks can help you build stronger and stronger abdominal muscles.
This is a simple exercise to master and can aid in improving the aesthetics of your body within a matter of minutes.
Seated Knee Tucks: Instructions
Setup
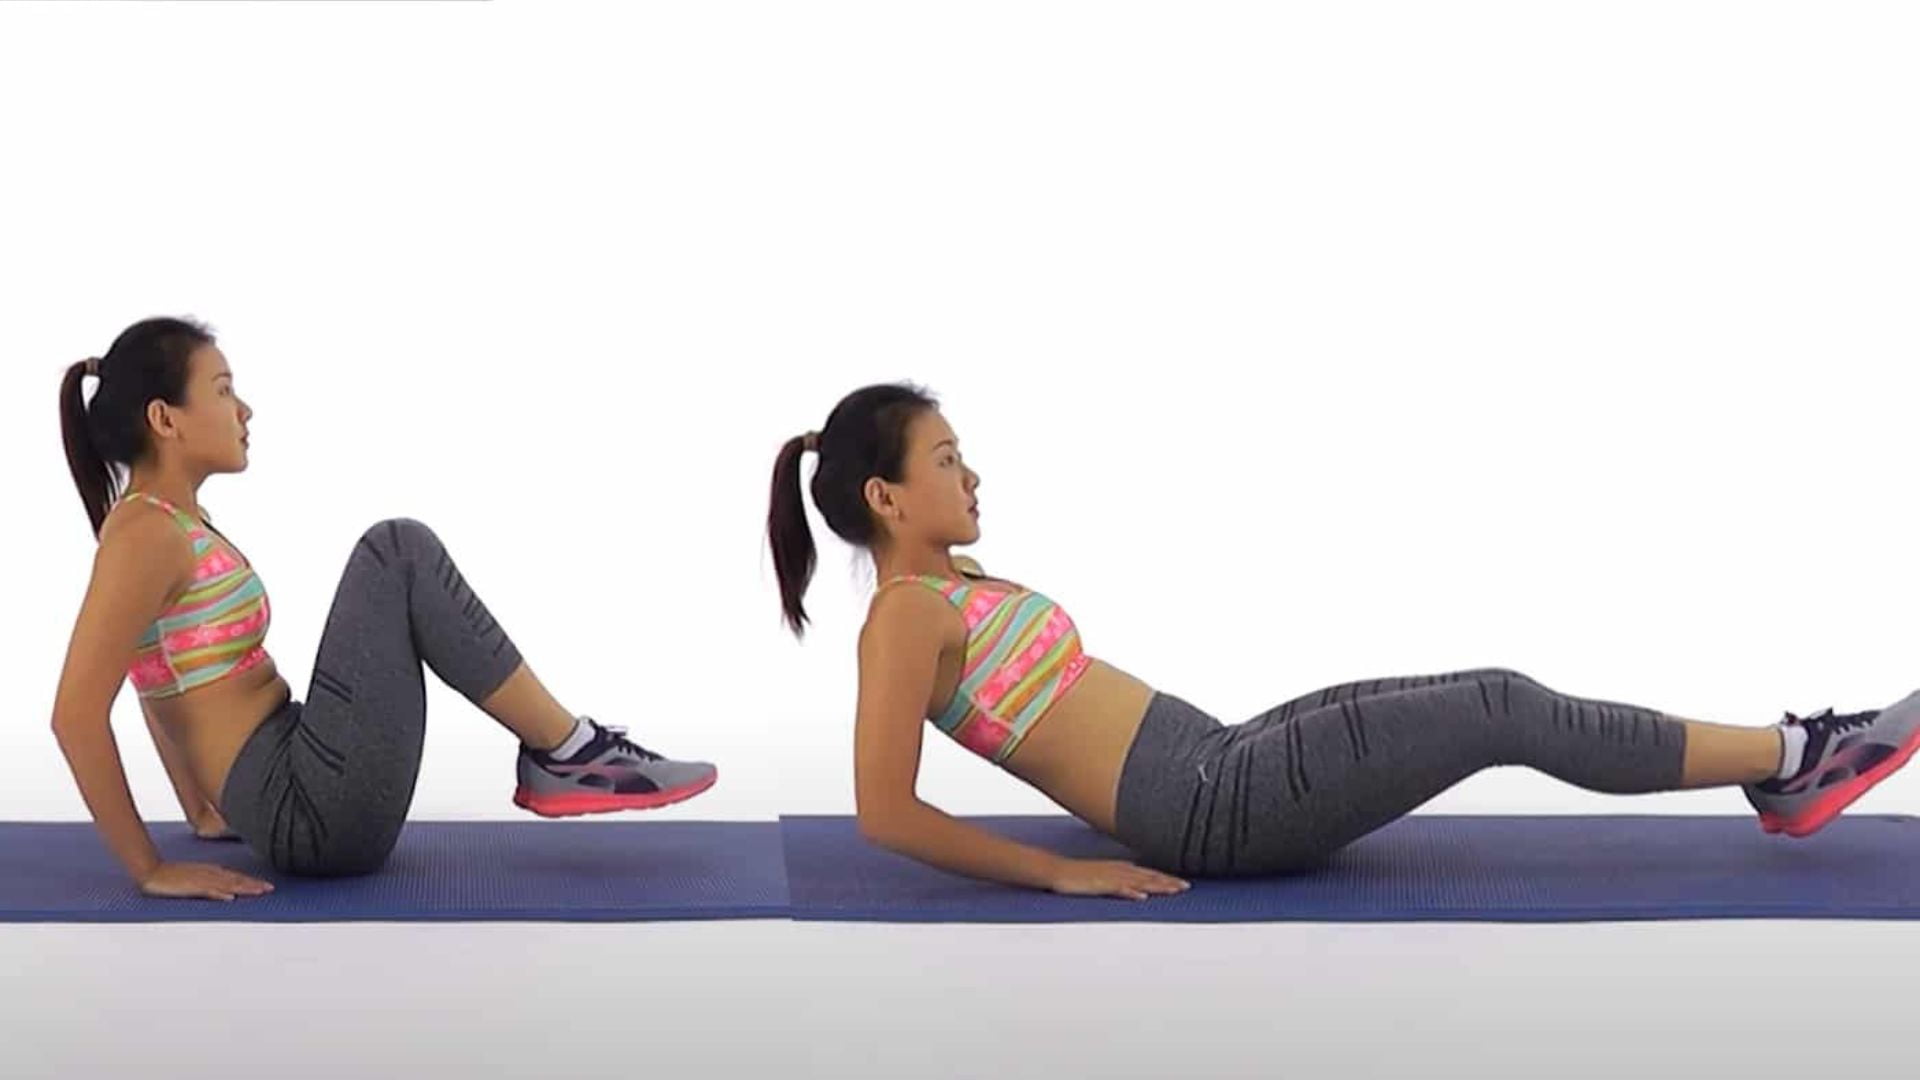
- You should sit on the ground, with your legs spread out towards the front.
- Put your feet on the floor in front of your body to support you and lean back at 45 degrees with a straight back.
- Bring your belly button toward your spine. Then, lift your legs above the ground.
Instructions
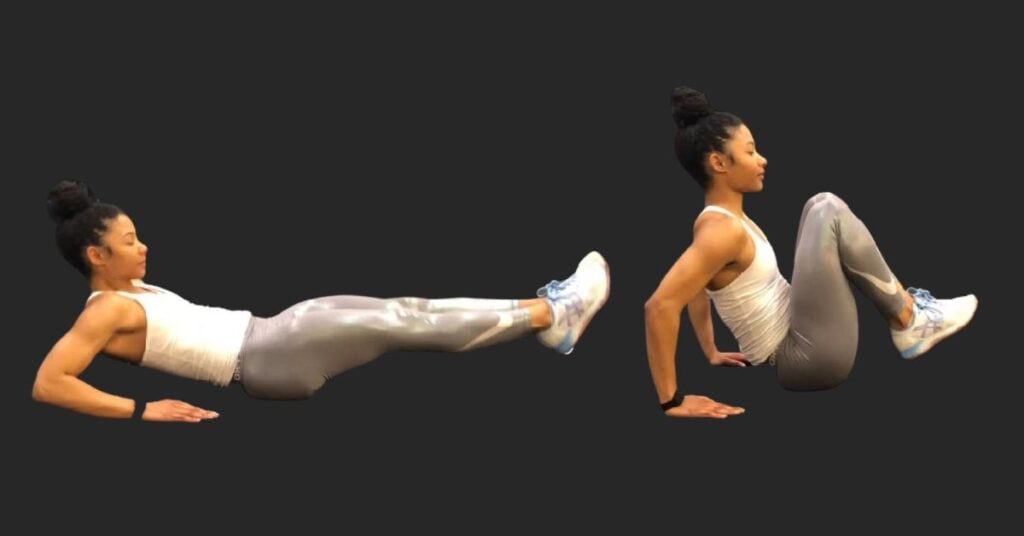
- Intensify your lower abdominals while bending their knees, then pull your legs towards your chest.
- Squeeze your abs with force and slowly return to your beginning position.
- Repeat this movement for the number you want to repeat.
Recommendation
Depending on your core strength, You should try to do anywhere between 10-20 repetitions of seated knee tucks over 3-4 sets.
Seated Knee Tucks: Mistakes
#1 Completing Partially Reps
The most frequently made error in seated knee tucks is performing only half repetitions. After bringing their knees up to their chests, most people maintain their bent knees and then return them halfway back to their starting position.
To maximize each exercise, you should be able to fully extend your legs each time. Doing this will ensure that you are putting all your energy into your abs during the exercise movement.
#2 Rounding Your Back
Seated knee tucks depend on stability. If you round your back in a way, they place stress on your spines and can cause back injury.
To avoid this error, make sure you keep your back straight and stabilize your upper back. This will help protect your spine, but it will also increase the stress in your core.
#3 Spraying The Motion
Another frequent seated knee tuck error is to rush the process. Often, people jerk their upper bodies around to push their legs towards them and away from them.
While this is certain to increase your heart rate, speeding through the movement will strain your abs and put it on your back and arms. Seated knee tucks are intended to be done at a slower pace.
To correct this error, make sure you can get the full extension of your abs. You can do this by shifting your legs in a circular motion.
Seated Knee Tucks: Variations
#1 Weighted Seated Knee Tucks
If you think you’ve mastered the seated knee tucks, you can try to add some extra weight.
Place the medical ball (or any other weight) between your ankles and then perform the seated knee tucks using the same technique as the body weight variation.
#2 Hanging Knee Tucks
It is also possible to do knee tucks in a hanging position. Get a pull-up bar, with your hands spread shoulder-width apart and your palms in a different direction from yours.
Work your abs until you can extend your legs straight towards you. After that, you can complete the hanging knee tucks.
#3 Seated Knee Tucks To Leg Crunches
It’s also possible to do seated knee tucks along with different exercises. For instance, you could switch between leg crunches and seated knee tucks.
After completing seated knee tucks, maintain your straight legs while contracting your abs to pull your thighs closer to your chest. After that, return to seated knee tucks, and keep switching.
Seated Knee Tucks: Alternatives
If you’ve enjoyed seated knee tucks, you should check out these ab exercises that will increase your core fitness:
#1 Hip Thrusts
Relax in a prone position and bend the knees a bit. Engage your abs to push your lower body straight up.
Return to the starting point by easing your abs and your hips while keeping your hips off of the floor and your legs straight upwards.
Repeat!
#2 Flutter Kicks
Lay on your back and rest your arms at your sides. Lift your legs to approximately six inches above the floor.
While keeping your legs straight, lower one foot until it hovers just a little over the floor. After that, lift this foot, and lower the other one down.
Maintain alternating feet, and be certain you keep those abs active all the duration!
#3 Alternating Knee Ins
Begin by lying on your back, with your legs straight towards the front. Bring your belly button in, and lift your legs and head from the floor.
While keeping your core in place, Keep your core engaged, and place one knee in your chest while keeping the other leg fully extended.
Gradually straighten your bent leg, then move the other knee towards your chest. Continue to alternate legs and repeat!
Last Words
If time is limited, make sure you don’t perform your primary workout at the gym. Instead, concentrate on exercises that you cannot perform at home, such as bench presses, squats, and deadlifts. If you’ve got some spare time, take out your mat at the gym and begin working on your core at home with exercises that use your body weight. Every week, a couple of 10- to 15-minute sessions are all you require to build a stronger, healthier and more firm midsection.


